Japan eSIM for Families: How to Connect Multiple Devices on One Trip
Why Families Need a Connectivity Plan Before Landing in Japan
Japan runs on connectivity. Train schedules, Google Maps navigation between Shinjuku station exits, restaurant translation apps, contactless payments — nearly every aspect of a Japan trip depends on having reliable mobile data. When you multiply that need across four or five family members, each with their own device, the logistics get complicated fast.
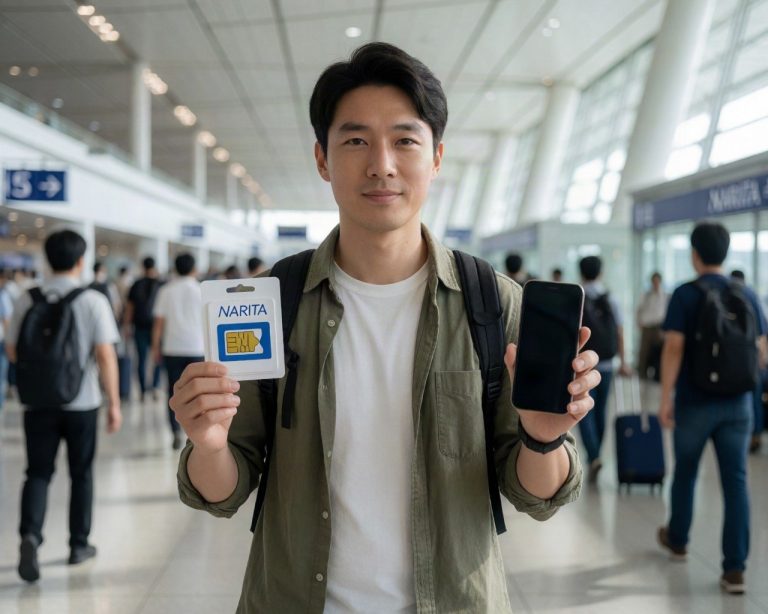
Physical SIM cards used to be the default. You’d land at Narita or Kansai, queue at a counter, and hope they had enough cards for everyone. eSIM technology has changed this completely. You can now activate digital SIM profiles on multiple devices before you even board your flight, and the whole family arrives in Japan already online.
This guide breaks down how to choose, purchase, and manage Japan eSIM plans across multiple devices for a family trip — covering everything from data needs per person to cost-saving strategies.
TL;DR
Families travelling to Japan should equip each eSIM-compatible device with its own plan. Look for providers offering unlimited or high-cap data plans so no one runs out mid-trip. Buying multiple eSIM Japan plans from one provider simplifies management. Budget roughly $5–15 USD per device per day depending on data tier. Activate before departure to avoid airport scrambles.
Understanding eSIM Basics for Multi-Device Travel
An eSIM is a digital SIM embedded in modern smartphones, tablets, and smartwatches. Instead of swapping a tiny chip, you scan a QR code or enter an activation code, and the device connects to a local carrier network. For Japan, that typically means routing through NTT Docomo, SoftBank, or KDDI (au) infrastructure.
The critical thing for families: each device needs its own eSIM plan. You can’t share a single eSIM profile across multiple phones. So a family of four with four phones needs four separate plans.
Some parents also bring a tablet for the kids or carry a secondary device for work. Each of those counts as a separate device requiring its own profile. Planning ahead and purchasing all plans at once from the same provider keeps things organized and reduces troubleshooting during the trip.
How Much Data Does a Family Actually Need in Japan?
Data consumption varies wildly across family members. Here’s a realistic breakdown based on typical travel usage:
Adults (Navigation, Translation, Bookings)
A parent navigating Japan with Google Maps, using translation apps like Google Translate’s camera feature, checking train times on Hyperdia or Navitime, and occasionally uploading photos to social media will use roughly 1–2 GB per day. Add video calls to relatives back home and that jumps to 3 GB or more.
Teenagers (Social Media, Streaming, Messaging)
Teens tend to be the heaviest data consumers. Instagram stories, TikTok uploads, Snapchat, and YouTube can easily chew through 2–4 GB daily. If your teenager is streaming music or video while on bullet trains, budget for unlimited data or at minimum 3 GB per day.
Younger Children (Tablets, Games, Video)
Kids watching downloaded content on a tablet use zero mobile data. But if they’re streaming YouTube Kids or playing online games, consumption spikes. A good strategy: download entertainment before leaving the hotel each morning using Wi-Fi, then use a smaller data plan for the child’s device as backup.
For most families, the safest approach is choosing eSIM Japan unlimited data plans for the primary adult devices and moderate data plans for children’s devices.
What to Look for in a Family-Friendly Japan eSIM Provider
Not all eSIM providers are created equal, and what works for a solo traveller doesn’t always scale for families. Here’s what matters when you’re buying for multiple people:
Multiple Plan Purchases from One Account
You want a provider that lets you buy several plans under a single account. This makes it easy to track activation codes, manage support tickets, and handle any issues from one dashboard. Providers like Traveller eSIM, Airalo, and Holafly all allow multiple purchases per account.
Unlimited or High-Cap Data Options
Running out of data in the middle of Shibuya with a family of five is not the kind of adventure you want. Unlimited data plans remove that anxiety entirely. Even “unlimited” plans may have fair usage policies that throttle speeds after a certain threshold — usually 500 MB to 1 GB per day at full speed — so read the fine print. True unlimited high-speed plans exist but cost more. For families, the peace of mind is usually worth the premium.
Network Quality in Japan
Japan has some of the best mobile infrastructure on the planet. The key question is which underlying carrier the eSIM provider uses. Plans routed through NTT Docomo generally offer the widest rural coverage, which matters if you’re visiting places like Hakone, Takayama, or Yakushima. SoftBank and KDDI provide excellent urban coverage. According to Opensignal’s network experience reports, all three major Japanese carriers deliver strong 4G and 5G performance in metropolitan areas.
Plan Duration Flexibility
Family trips to Japan often run 10–14 days. Some providers only offer 7-day or 30-day plans. A 7-day plan forces you to buy two per device for a 10-day trip, which adds cost and complexity. Look for providers with 10, 14, or 15-day options to match your itinerary length closely.
Hotspot and Tethering Support
This is a big one for families. If one family member’s plan supports tethering (personal hotspot), they can share their connection with a child’s non-eSIM-compatible device like an older iPad or a Nintendo Switch. Not all eSIM plans allow tethering, so verify this before purchasing. Plans that explicitly support hotspot use can reduce the total number of plans you need to buy.
Cost Breakdown: Connecting a Family of Four for Two Weeks
Let’s run the numbers for a typical family — two adults, two children — on a 14-day Japan trip.
Option A: Unlimited data for everyone
4 unlimited plans × ~$40–70 each (14 days) = $160–280 total
Best for: Families who don’t want to think about data limits at all.
Option B: Unlimited for adults, moderate for kids
2 unlimited plans × ~$45–70 each = $90–140
2 moderate plans (1 GB/day) × ~$20–35 each = $40–70
Total: $130–210
Best for: Families where kids mostly use hotel Wi-Fi and downloaded content.
Option C: Two unlimited plans with tethering
2 unlimited plans with hotspot × ~$50–75 each = $100–150
Kids connect via parents’ hotspot
Total: $100–150
Best for: Budget-conscious families with younger children who stay close to parents.
Compared to renting pocket Wi-Fi devices at the airport — which typically run $8–12 per device per day — eSIM plans for families almost always come out cheaper, especially for trips longer than a week.
Device Compatibility: Check Before You Buy
This is where family plans can hit a snag. Not every device supports eSIM. Here’s a quick compatibility rundown:
iPhones: iPhone XS and later models support eSIM. The iPhone 14 (US models) and iPhone 15/16 series are eSIM-only with no physical SIM slot.
Android: Samsung Galaxy S20 and newer, Google Pixel 3a and newer, and select models from Xiaomi, Oppo, and Motorola support eSIM. Coverage is less universal than Apple devices, so check each family member’s specific model.
iPads: iPad Pro (3rd gen and later), iPad Air (3rd gen and later), and iPad mini (5th gen and later) with cellular capability support eSIM.
Smartwatches: Apple Watch Series 3+ and Samsung Galaxy Watch 4+ support eSIM, though watch eSIM for travel is limited and generally not practical for Japan trips.
If a family member has an older phone without eSIM support, consider picking up a cheap pocket Wi-Fi rental at the airport for that one device, while equipping everyone else with eSIM Japan plans.
Step-by-Step: Setting Up eSIMs for the Whole Family
Getting everyone connected doesn’t need to be chaotic. Follow this process a day or two before your flight:
1. Verify device compatibility for every phone and tablet in the family. Check settings > cellular/mobile data > look for “Add eSIM” or “Add Cellular Plan” option.
2. Purchase all plans at once from one provider. Save each QR code or activation link — label them clearly (e.g., “Mom’s iPhone,” “Kai’s iPad”).
3. Install the eSIM profiles on each device while still at home on Wi-Fi. Most providers let you install the profile immediately but delay activation until you arrive in Japan or until a specific start date.
4. Label the eSIM line on each device. On iPhones, go to Settings > Cellular > tap the new eSIM line > rename it “Japan Travel” to avoid confusion with the primary home line.
5. Test on arrival. Once you land in Japan and turn off airplane mode, each device should connect automatically. If a device doesn’t connect, toggle the eSIM line off and on, or restart the phone.
6. Set data roaming to ON for the eSIM line on each device. Many Japan travel eSIMs technically operate as roaming profiles, so this toggle needs to be enabled even though you’re using a local network.
Pocket Wi-Fi vs. eSIM for Families: Which Wins?
Pocket Wi-Fi has been the traditional family solution for Japan travel. You rent a small device that creates a portable hotspot, and everyone connects to it. Simple in theory. In practice, it has real drawbacks for families.
The pocket Wi-Fi device needs to stay charged — and its battery rarely lasts a full sightseeing day. If the family splits up (one parent takes older kids to Akihabara while the other stays in Ueno with younger ones), the group without the pocket Wi-Fi has no internet. You also need to return the device at the airport before departure, adding one more task to an already hectic travel day.
eSIMs eliminate all of these problems. Each person carries their own connection. No shared battery anxiety. No return logistics. And if your eSIM Japan unlimited data plan supports tethering, you still get hotspot functionality when you need it — without carrying an extra gadget.
The only scenario where pocket Wi-Fi still makes sense is if multiple family members have devices that don’t support eSIM. In that case, a hybrid approach — eSIMs for compatible devices and one pocket Wi-Fi for the rest — gives the best coverage.
Pro Tips for Families Using eSIMs in Japan
Download offline maps before you go. Google Maps allows you to download entire regions of Japan for offline use. This serves as a backup if anyone’s data connection drops temporarily, especially in rural areas or underground subway stations.
Use a family group chat. Set up a LINE group (Japan’s dominant messaging app) or WhatsApp family group before the trip. With everyone on their own data plan, staying in touch throughout the day becomes effortless — critical in crowded places like Tsukiji Outer Market or Fushimi Inari.
Monitor children’s data usage. On iPhones, go to Settings > Cellular > scroll down to see per-app data usage. Reset the statistics on day one so you can track consumption through the trip. Android has similar tracking under Settings > Network & Internet > Data Usage. This helps you spot if a child is burning through data unexpectedly.
Keep QR codes backed up. Save screenshots of every eSIM QR code to a shared cloud folder (Google Drive, iCloud). If someone’s phone needs a factory reset or replacement during the trip, having the original QR code can speed up re-installation, though some eSIMs are single-use and would require contacting support.
Consider travel insurance with device coverage. Japan is safe, but accidents happen. As reported by the Japan National Tourism Organization, millions of tourists visit annually without incident, but having device replacement coverage means a cracked phone doesn’t leave someone disconnected for the rest of the trip.
When to Activate: Timing Matters
Most eSIM plans start their validity clock either on the date of installation or on the first data connection in Japan. This distinction matters for families. If you install a plan a week early and validity begins at installation, you’ll lose days before you even arrive.
The best approach: choose plans that activate on first use. Install the profiles at home, fly to Japan, and the countdown begins only when the device first connects to a Japanese network. This maximizes every day of your plan.
Choosing the Right Plan Duration for Your Itinerary
Japan family itineraries tend to follow common patterns: 7 days for a focused Tokyo-Kyoto trip, 10 days for adding Osaka and Hiroshima, or 14+ days for a deep exploration including Hokkaido or Okinawa. Match your eSIM plan length to your actual stay. Buying a 30-day plan for a 10-day trip wastes money. A 7-day plan for an 11-day trip creates a mid-vacation headache of needing to buy and install a second round of plans for everyone.
Providers that offer 10-day and 15-day plan options tend to align better with real family travel schedules than those locked into 7 or 30-day increments.
Frequently Asked Questions
Can I use one eSIM for multiple family devices in Japan?
No. Each device requires its own separate eSIM plan. You cannot share a single eSIM profile across multiple phones or tablets. Purchase one plan per device from the same provider to keep management simple.
How many eSIM plans can I buy from one account?
Most eSIM providers allow you to purchase multiple plans under a single account. Providers like Traveller eSIM, Airalo, and Holafly all support multiple plan purchases, making it easy to buy for the whole family at once.
Do Japan eSIM plans support hotspot tethering?
Some do and some don’t. Check the plan details before purchasing. Plans that support hotspot or tethering let you share your connection with a child’s non-eSIM device, potentially reducing the total number of plans you need.
What is the best Japan eSIM plan for families with heavy data usage?
Unlimited data plans are the best choice for families with teenagers or multiple heavy users. Look for plans offering true unlimited high-speed data rather than plans that throttle after a small daily cap. This prevents anyone from running out of data mid-trip.
Is pocket Wi-Fi or eSIM better for a family trip to Japan?
eSIM is generally better for families because each person has their own independent connection. Pocket Wi-Fi requires the family to stay together, has battery limitations, and must be returned at the airport. eSIMs offer more flexibility and are typically cheaper for trips over a week.
When should I install Japan eSIM plans for my family?
Install eSIM profiles on all family devices 1–2 days before departure while on home Wi-Fi. Choose plans that activate on first use in Japan rather than on installation date. This way your plan validity doesn’t start counting down until you actually land and connect.